I was asked to make a Bible cake for someone's 90th Birthday this week. His favourite flavour is chocolate so I made my favourite chocolate cake recipe. I wanted this cake to taste and look as good as possible but I had a limit on the cost of ingredients, so it was important I stuck within this budget.
I was pleased to be able to make a cake 24cm x 34cm so the cake was nice and big for sharing. To fill this tin I used the following ingredients:
500g Unsalted Butter
500g Plain Chocolate
500g Plain Flour
2tsp Baking Powder
2tsp Bicarbonate of Soda
8 Eggs
712g Light Soft Brown Sugar
568ml Soured Cream
Melt the chocolate and the butter together. Pour this into the flour and sugar. Mix together the soured cream and eggs, pour this mixture into the flour mix and combine the whole lot. Pour into a greased tin and bake in the oven until a skewer comes out clean, around 1.30 hours.
Once the cake is cool turn it out of the tin.
 |
| Chocolate Cake |
I measured to find the centre of the cake and scored a line down the centre with a knife. From this line I sliced out some cake and shaped it down to form the folds of the book. I also shaped the outer side of the cake to form the edges down to the cake.
 |
| Shaped Cake |
Once I was happy with the shape of the cake I covered it in chocolate butter icing and allowed it to set.
I coloured some sugar paste slightly ivory and rolled out to a rectangle. This was placed over the cake and smoothed over.
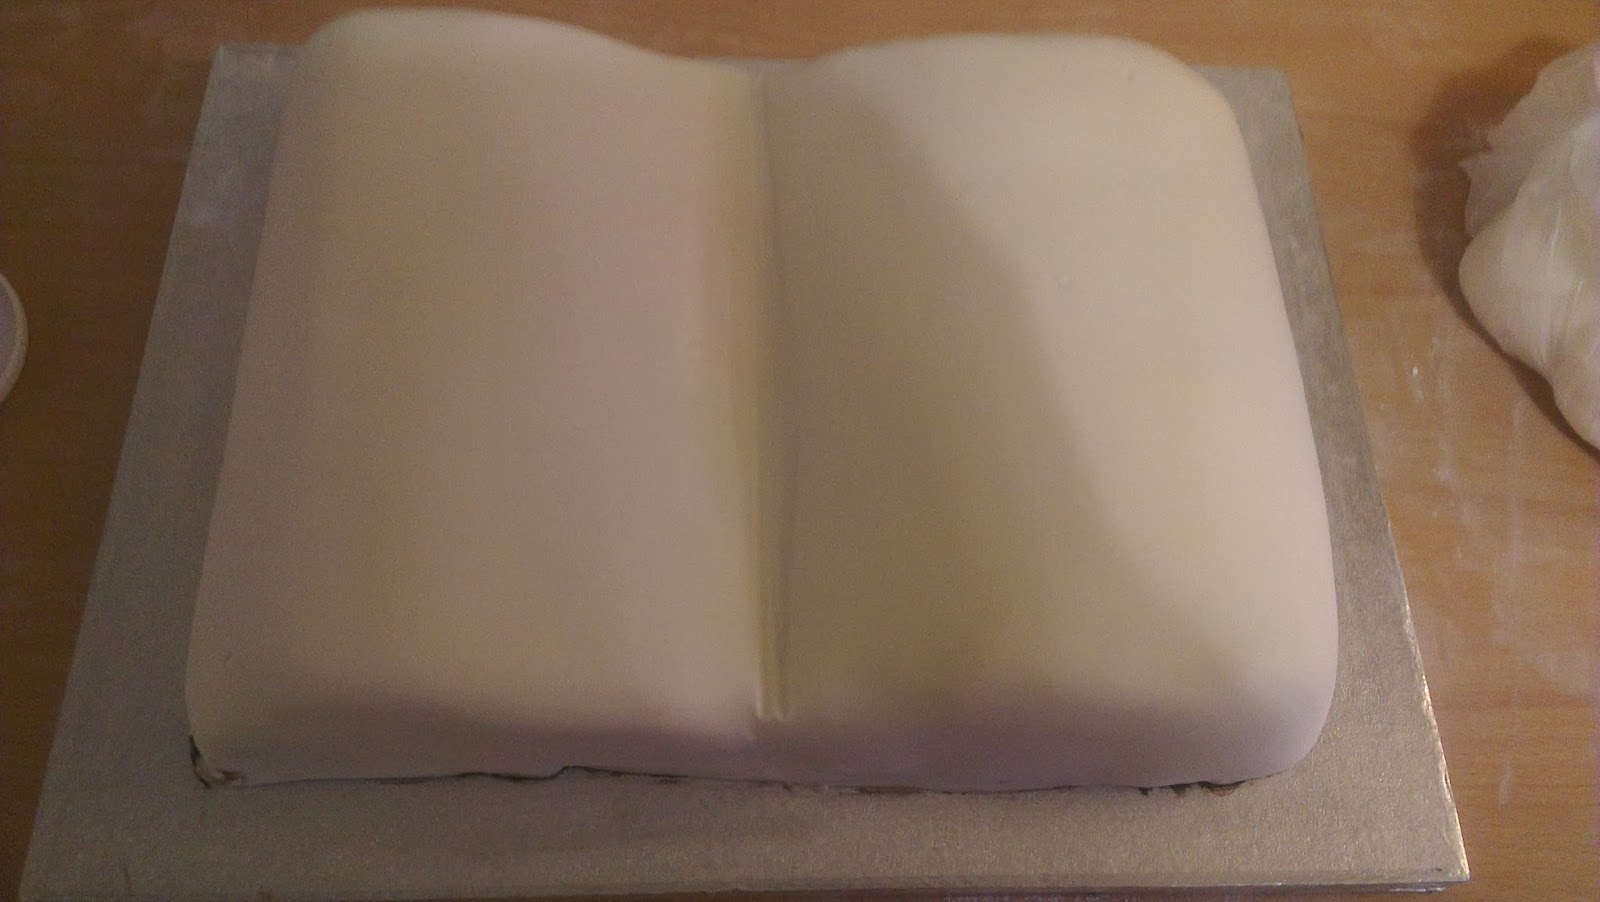 |
| Covered Cake |
Using the same colour paste I added some gum so it would dry harder and rolled out 2 smaller sheets of icing. This formed the top page of the book. I stuck these on with slightly folds in the pages to create a 3D effect.
Using metalic gold paint I painted the outside of the book to create a gold leaf effect on the edge of the pages. I was careful to paint this only in the direction of the page lines. I marked the edges of the pages to create faint lines and the effect of the edge of the pages.
 |
| Pages Laid Ontop |
The biggest challenge on this cake was to pipe the verse on the top. I'm still practicing my piping skills and was very worried about this but it turned out ok in the end. I tried to stencil it through some paper, however, this didn't really work so I ended up piping it freehand. On the advice of a friend, I used some paper as a line guide to keep everything straight. I found that by writing the verse into a word document and then using this as a visual guide I could see how big my writing needed to be and how spaced out. I used black royal icing to pipe this.
 |
| Verse is Piped |
The final steps were to create a book cord by twisting two different colours of icing together and to create a ribbon book mark by using a thin strip of icing.
 |
| Finished Cake |
 |
| Cord and book mark detailing |
 |
| Side View |
Overall I was really pleased with this cake. I couldn't have done it better at this stage. I still need to improve my piping but it's my best attempt so far. I am also confident that the cake will taste really good so overall this cake is good.
If you would like a cake made for any occasion please get in touch. I can work towards your budget and design and we can discuss options together. At present I'm cooking for the cost of ingredients (December 2013) but this won't be the case for much longer. I am currently thinking about how much I'd charge for cakes like this and others. If you were to order this cake, how much would you be willing to pay? Considering ingredients cost £25 and I spent around 8 hours of work on the cake?
No comments:
Post a Comment